Here is an EASY WAY to sharpen a knife and keep it sharp.
This works for any knife- kitchen knife, fillet knife, outdoor knife, camping knife, even for serrated knife sharpening, and it’s VERY easy!
All knives are dangerous, but a sharp knife is a pleasure to use while a blunt knife is frustrating and the excess force necessary can be more dangerous if the knife slips.
This is easily my choice of knife sharpener
Lanskey Sharpening Rods
The important points of knife sharpening are
1. The correct edge angle –
- 17º for fine slicing like filleting
- 20º for general slicing and cutting in the kitchen
- 25º for Utility, Camping etc
2. Keep exactly to that angle when sharpening
- This is not easy, most people twist the knife as they pass it over a grind stone or sharpening rod which changes the angle being ground.
3. Sharpen the entire length of the blade
- It’s easy to apply more pressure at the midpoint of the blade as it passes over a sharpener and this will wear away more metal so there won’t be a straight line or gentle curve along the edge
4. Remove the minimum amount of metal to get a sharp edge.
- The less excess metal you remove, the longer the life of the blade.
5. Run each side of the blade alternately across the sharpening device.
- If you work on one side for several strokes you are bending the fine edge over and when you begin on the other side you bend the burr back the other way possibly causing more metal to be removed as the burr breaks through metal fatigue.
Knife Sharpening Devices
Whetstone: For years I’ve sharpened knives on a wetstone.
I understand the technique well but sometimes I would spend ages trying to get a brilliant edge – because of failing on points 1 & 2.
Afterwards the the knife would need cleaning because of the oil all over it.
Sharpening all the kitchen knives was a chore and so it wasn’t done very often.
There are also diamond faced whetstones, some people use them dry, some add oil or water.
Grinding Wheel: I bought a mini grinding wheel and used that for about 5 years

Sometimes I’d get a good edge, sometimes not because of failing on points 1 and 2 above. It removed a lot of metal.
Ceramic Rod: A ceramic rod is a good knife sharpener, very quick but it’s not easy to keep to the same angle through the stroke, and extremely difficult to know what angle you are creating on the edge.
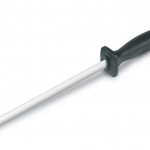
NOT to be confused with a Butchers Steel which DOES NOT SHARPEN.
Many people, including me, have seen famous TV chefs and local butchers using a steel, and are surprised to discover that the steel doesn’t sharpen!
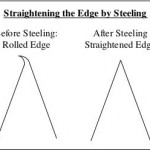
What it does do is to restore the edge by removing the burr which is caused as the fine edge bends over from use.
A Butchers steel removes the burrs but it does very little else.
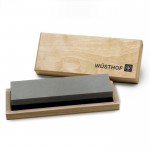
Fixed Stone: This is a very good system that guarantees the correct angle, where the knife blade is held in a clamp and the stone is held automatically at the correct angle.
This is the Lanskey version –
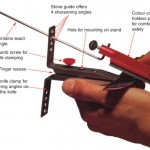
I’ve seen a few makes of these online and even home made ones. It’s certainly a very good system which fulfills all the important points necessary to get a sharp edge on a knife.
This is my second choice because there’s more setting up to do than my first choice, I expect that I’d use it less often.
CONCLUSION
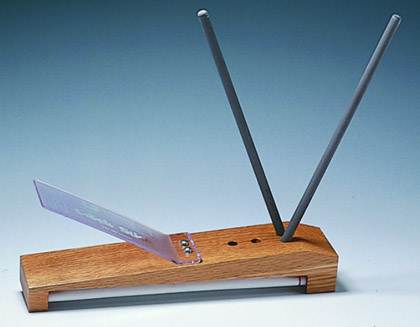
I’ve had the Lanskey Professional Crock Stick Sharpener for 3 years and I’m extremely happy with it.
I’ve looked at many ways to sharpen knives and I choose this system because it is so ridiculously easy.
Instead of sharpening kitchen knives once every 6 months, I’m keeping their edge up weekly, I’ll even touch up a knife before using it for an important job.
All it takes is TWELVE STROKES!!!!
Hardly any metal is removed
It takes seconds
Slicing tomatoes, fruit, vegies – anything, is a joy.
By holding the knife vertically, sliding down and drawing back across the rods alternately 12 times as if slicing bread, fulfills all the important factors of knife sharpening.
My knives have never been so sharp
Lanskey now have a new version made of plastic instead of wood
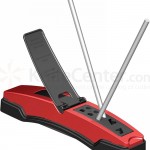
It also takes the triangular rods that sharpen serrated knives.
Most of the knife sharpeners that I haven’t mentioned, especially tungsten carbide types, generally remove too much metal from the blade (#4) and often suffer from the #3 problem.
I don’t have any connection with Lanskeys. I whinge if a product is bad and I praise it when I find something good !
Please comment below if you found this article helpful.
Share


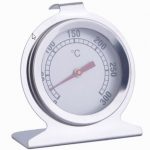
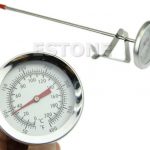 The simplest meat thermometer is a probe connected to an analogue dial.
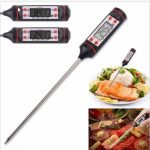 Digital thermometers give accurate readings.
 The Probe is attached by an insulated wire, and can be left in the meat while cooking.
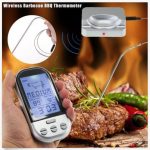 These are extremely useful meat thermometers.